2014 Life Verse

Trust in the Lord with all your heart, and lean not on your own understanding; In all your ways acknowledge Him and He shall direct your path. Proverbs 3:5-6


Tuesday, May 14, 2013

Lady Bug Card

Howdy y'all.  It's been pretty chilly here this week, so I thought I would make a card to try and bring back some beautiful Spring weather.

This cute card uses an image from the internet that I found a while ago.  


I colored this little lady with BIC markers.  I followed this week's sketch from My Favorite Things to make this card using papers from DCWV.  I matted each paper and the image on a Blue card stock from Recollections.  The card base is made from the same Blue card stock.  Adding two square buttons from my stash finished up the card.

To create the inside of the card, I used the same papers and card stock, following the sketch pretty closely.  I don't know why there is such a shadow on the right side of the picture, but there isn't a dark spot on the actual card.

Thanks for stopping by today.  I truly appreciate the support.  God bless y'all.

Challenges:
My Favorite Things--Sketch
Pink Gems--Things with Wings
My Time to Craft--Show us the Inside

Without my Coffee

Hello my friends.  Welcome back.  Even though I haven't been posting, I have been creating.  I have a card for y'all this time that uses a Digi Darla image.


I used my BIC markers to color in this image.  I added some glitter to the cell phone and her coffee mug.  The image was cut using my Cuttlebug and Nestabilities.  The banners were hand cut.  The black and white polka dot at the top is Washi Tape.  I printed out the sentiment from my Word Processing program.  The card base is Black from Recollections and the DP is DCWV All Girl stack.  I pulled some pink card stock from my stash to make the two pink banners.  All the papers and card stock were in my stash bin.  I added some pink gems to finish it off.

Thanks so much for stopping by today.  I truly appreciate it.  God bless y'all.

Challenges:
Crafts4Eternity--#123  Tic-Tac-Toe (Pink, Bling, 3 of something--my three of something is the banners)
Shopping Our Stash--#101 Scrap Attack

Hello my friend card

Hello there my crafty friends.  Thanks for stopping by to visit.  I have been slacking about posting again, but I am trying to get all my health issues under control.  It's going to be a long road, but I am going to make it.  With God in control, I can't help but pull through.

I have a card today that uses an image from Anne Fenton and some more dyed flowers that I used the homemade alcohol inks on.


After printing out the image, I used colored pencils and OMS to add color.  I trimmed down the image and matted it on a panel of Daffodil Delight from SU.  I used three different patterned papers from DCWV All Girl stack.  I used a card base from the Daffodil Delight and used Pink card stock from Recollections for the mats.  The sentiment is from Desert Diva and is matted on two layers.  All of the flowers were dyed with the homemade alcohol inks that I made.  I added some brads to the middle of the smaller flowers and added some gems at the bottom to finish it off.

Thanks again for visiting me today.  I hope y'all are enjoying your week.  God bless y'all.

Challenges:
Simply Create Too--#37  Anything Goes
Sentimental Sundays--#154 For a Special Lady
Love to Create--#65 Flowers
Oldie But a Goodie--Inspired by a song--Song: You've Got a Friend by James Taylor.  Oldies: DP

Thursday, May 9, 2013

Big Girl Panties

Good Morning my friends.  I hope your week is going good.  I had a doctor's appt. yesterday and have finally discovered the reason behind my severe pain, exhaustion, and other issues.  I have Fibromyalgia.  But, I cannot take care of that until I get the PTSD under control because I can't be medicated when I go see the doctor.  I have to be feeling all the emotional issues so that the doctor can prescribe the right combo of meds for the PTSD.  Go figure.  If it isn't one thing it's another..always.  But, I do have my crafting to help keep me sane.

So, here's a cute card that I made for a couple of challenges.


When I saw this sentiment from Create with TLC, I knew I had to use it on a card.  I love it!  The little girl is from The Digi Garden.  I used my Chromatix to color her in and the Fiskars Shape Maker to cut it out. I inked the edges of the image and sentiment with DI Vintage Photo.  I followed a sketch from Feeling Sketchy to make this card.  The card base is Old Olive from SU.  The DP background is American Crafts and the DP pieces are DCWV.  I added some gems from Queen and Co and the flower is one that I dyed using the homemade alcohol inks.

Thanks so much for stopping by today.  I truly appreciate it.  God bless y'all and have a great day!

Challenges:
Twisted Tuesday--#49  Free For All
Southern Girls--#68  You Can Say That Again
Papertake Weekly--Anything Goes

Tuesday, May 7, 2013

Mother's Day Card

Howdy y'all.  Welcome back to my blog.  I have a card to show tonight that uses some of the roses and flowers that I dyed using my homemade alcohol inks. I used a Rick St. Dennis image to make this card and printed it out on a new card stock that I found at AC Moore.  It's from Crafter's Companion, the company that makes the Spectrum Noir pens.  I ran out of my Neenah and needed some card stock so I picked up two packs of 25 for $8.


So, what do you think?  The roses and the small silk flowers are dyed with the homemade alcohol inks. 

I colored the image with Chromatix pens.  I trimmed down the image, matted it on a panel of pink and then a panel of black.  The DPs are from Authentique and MME.  The card base is made from Bazzill Blackbird card stock.   The sentiment is from Beccy Muir and is included in the Rose Bouquet set.   I had to add the main sentiment to the inside, because there just wasn't room on the front to add the Scripture from Proverbs 31. 

I just kept adding embellies until I liked the look of it.  There are pearls, lace, flowers, acetate flowers, acrylic sprays, pearl sprays.  And for one of my challenges that I am entering this card in, I had to have ribbon.  I couldn't add anything else to the card, so there is ribbon on the image itself.  I hope that qualifies.  It's a little sneaky, but the ribbon is there.

Thanks for stopping by today.  I hope y'all have a great evening.  God bless.

Challenges:
Milk Coffee--Lace and Pearls
One Stop Craft--#227 Flower Power
Robyn's fetish--#158--Spring Colors
ABC Challenges--#27  Tic Tac Toe  Ribbon, Flowers, and Pink CS
Love to Create--#64  For Mom
The Pink Elephant--#198  Mother's Day
Craft Your Passion--#161 Floral Delights
Created with Love--#40  Mother's Day
Twists of Faith--#36  Mother's Day
Crafter's Cafe--Mother's Day
One Crazy Stamper--May flowers
Chocolate Coffee Cards--Mother's Day
V's Sweet Ideas-- Mother's Day

Cheap Tip #2--Making Your Own Glimmermist

Hey friends.  Thanks for coming back.  I have another cheap tip for y'all.  I know that there are alot of You Tube videos out there on how to make your own Glimmer Mist.  I met a lady in the Dollar Tree last week and we were talking in the scrapbook isle and she was telling me that she makes her own and proceeded to tell me how she did it.  I thought, hey, this sounds easy enough so I tried it.  I LOVE it!!

Here's what you will need:

A mister bottle of some sort.  I found these for $1.99 each at AC Moore.  They are actual Ranger bottles with a fine mist.  I think they are 4 oz bottles.  I bought two, but the one won't spray so I have to take it back.

 Loose Powder Eyeshadow.  I bought these at the Dollar Tree for $1 each.  After making a bottle of each color, I still have enough shadow for at least two more refills each.
 Rubbing Alcohol.  If you want more information about the alcohol, see my post  on making your own alcohol inks and there is some additional info.

So, are y'all ready for some of the simplest instructions ever?

Step 1:  Pour the alcohol into your mister bottle leaving about 4 cm at the top.

Step 2:  Open the shadow and dump some in.  How much you put in will determine how much bling it sprays.  I didn't measure mine, I just dumped it in.

Step 3:  Shake well.  Every time you go to use it you will have to shake the bottle very well.  The shadow separates from the alcohol and settles on the bottom so make sure you shake well.

Here's what they each look like sprayed on black card stock:  The first one is the Snow color.  This one is just kind of irridescent.  Not a whole lot of color, but tons of sparkle.

 This one is the Sunglow.  It's more of a gold color and is very sparkly.

Now, if you decide you want the actual colored spray, just take a few drops of alcohol inks, food coloring or even hair dye and mix it into the bottle.  I didn't want any color, just the sparkle.  The homemade alcohol inks will work also.

Thanks for stopping by.  I hope you enjoyed learning something new.  God bless y'all.

Here's the break down:

Alcohol--$0  already had it
Eyeshadow--$2
Bottles--$4

You end up with 8 oz of spray so that's  $3.00 per bottle verses $7 per bottle of the name brand.  Plus, it won't cost you anything to make refills because you will have all the products at home.

Cheap Tip: Homemade Alcohol Inks

Hey there friends.  I have a couple of tips to share with y'all today to save yourselves a bit of money.  I know that I have a very strict budget and cannot get everything I would like.  I wish that I could have an unlimited crafting budget..boy would I have a ball.  I have a list as tall as I am of things I would like to have.

The first money saving tip I have for y'all is making your own alcohol inks.  I don't know if any of my wonderful followers already do this, but I thought I would share how I make mine.  I saw a video on YouTube and thought I would give it a try.

Here are the products you will need to make the inks:

Sharpie or BIC Markers.  I bought a pack of 24 Sharpies at Wal-mart for right around $10.

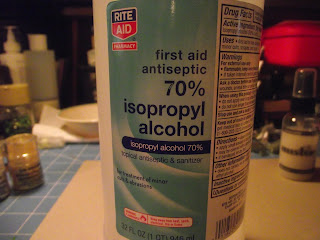
Rubbing Alcohol.  You can buy this is 50%, 70% or 90%.  I have the 70% because it was on sale a Rite Aid 3 bottles for $5.


Baby Food Jars.  I didn't have to buy the baby food and a friend of mine gave these jars to me.  I want to purchase drop bottles to transfer my inks into like ones from Ranger, but I haven't been able to afford them yet, so I still have my inks in the jars.


Ok.  Here we go:

Step 1:  Put 2oz of alcohol in each jar that you are going to use.  This is a good ratio amount for the amount of ink in each marker.

Step 2:  Take the marker apart.  To do this, use a pair of needle nosed pliers and a pair of vice grips.  For those of you who don't know what these are, ask your husbands, boyfriends, dads, or another male friend and I'm sure they will know and maybe even have some you can borrow.  Hold onto the barrel of the marker with the vice grips and using the needle nosed pliers, pull out the nib and drop it into the jar.  Next, twist off the nib end of the marker.  It's pretty hard, but if you twist enough, it will come off.  Once you have it off, turn it upside down and the ink barrel will fall out.  Take your needle nosed pliers and hold the ink chamber and cut it in half using an old pair of scissors or a craft knife.  Once you have it in half, slit it down the middle with your craft knife and drop each piece into the jar.

Step 3:  Put the lid on the jars and let the ink set for about 3 hours.  Either on the lid, or on a piece of sticky note, write the name color so you will know.

Step 4: Using your needle nosed pliers, pull out the ink barrels and squeeze as much of the ink out as possible.  You might want to wear rubber gloves or use another set of needle nosed pliers.

Step 5: Using an extra white flower, put it in the ink for about 5 minutes, let it dry and then adhere it onto the top of the lid.  This lets you see what color your flower will be.

Here's a pic of some of the flowers that I made today for a card that I created.

Here are the flowers sitting in the ink.
 Here are the flowers after they have dried and are ready to use.

I hope you guys liked this tutorial.  If you decide to make these inks, let me know what you think.

So, here's the breakdown of the cost:

Markers--$10
Alcohol-- $ 5
Jars---    $0

Total:  $15.00
Makes 24 jars of color so each jar of ink costs: $0.63.  Compare that to the $9.99 for two or three bottles of the Ranger brand.  Pretty cost effective right?

God bless y'all.

Beccy's Place Rose Bouquet Set


Hello friends.  I hope y'all are having a great day.  I have another card for y'all today that showcases the new set from Beccy Muir called Rose Bouquet.  


I used the single rose and two of the sentiments together to make this card.  I colored the rose blue because that is my MIL's favorite color.  I pulled a scrap of K and Co DP out of my stash and used that for the background.  I tied a piece of colored seam binding around the top of the card after running it through my Fiskars Border punch.  Adding a couple of dark blue pearls from Queen and Co finished off this card.  

Here is a peek at the entire digi set:

You get the colored images and black and white when you purchase the set.  You can grab this beautiful set here.

Thanks for stopping by today.  I truly appreciate it.  Have a wonderful day.  God bless y'all.

Digi Darla #61

Happy Tuesday my crafty friends.  I am a little behind with my blogging this week.  I should have had this posted yesterday, since it was the first day of the new Digi Darla Challenge.  But, here goes.

I am excited because I have been asked to choose the challenge themes for this month.  So, the first challenge for this month is 'Round and Round'.  The challenge is to make a round card.


I used the 'Wedding Bouquet 2' to create this card.  I used my BIC markers for the color.  I actually broke out my Cricut to make this card.  It's been about a year since I have used it, but I don't have a die big enough to make a base with.  I used the Sugar and Spice cartridge for the base and layers.

I inked the edges of the image and sentiment and just layered everything.

I ran the ribbon through two of the holes and tied a bow on the left side to finish it off.

Thanks for stopping by today and I hope y'all will join me over at Digi Darla's for the new challenge.

Wednesday, May 1, 2013

Indian Woman

Hi there.  Grab a seat..I have a story. 

Have any of you ever had the desire to meet your ancestors who have gone on before you?  I do.  Have them all the time.  My family has alot of Native American in it.  I have always been fascinated with American Indians.  The stories of the braves who stole their wives from white villages, the ability to take a deer hide and made a beautiful wedding dress, the long, thick, rich black hair.  But, there are the horror stories too..Battle of Bull Run, Chief Sitting Bull, The Trail of Tears..too many tears over the years.   I always envisioned that I would marry a Native American brave, but I got an Italian instead..go figure.

The card I made today uses an image of a Native American woman in a deer skin dress painting pottery.  This image is from QKR Stampede.


I used colored pencils and OMS to add life to this image.  Her long black hair is done up in a bun to keep it out of paint.  Her deer skin clothing is warm so it must be a winter portrait.  Even though you can't see her face, I feel like she is really concentrating on her work.

I chose the DPs because they remind me of the colors and designs of the Native American wares.  Not only the blankets, but the bags, clothes, hand made baskets and pottery.  The DP is American Crafts.  I put this on a card base made from SU Chocolate Chip.  I put the sentiment (Word Art Wednesday) at an angle so that the image would not be covered.  I didn't think it needed alot of bling.

Thanks for stopping by today.  If y'all have Native American in your family, I would love to hear about it in a comment.  Thanks so much..God bless y'all.

Challenges:
QKR Stampede--#36 Favorite Things (My favorite things are: using sketches and handmade flowers.)
Papertake Weekly--Sketch
Word Art Wednesday--Anything Goes

Psalm 127:3

Hi there..:)  So glad to see ya.  Pull up a chair, grab your coffee and let's see what we have for today.


This beautiful little momma is from The Paper Shelter and is called Light of My Life.  I colored her with colored pencils and OMS.  I chose four different patterns of paper from The Paper Studio Love You collection that I got on sale after Valentine's Day for $1.99.  Don't ya just love a good bargain?  I matted each piece of DP onto a pink panel.  The image and sentiment are matted on Chocolate Chip card stock from SU.  The card base is from Colobok.  I made the flower using a Paper Studio Brad and Pink Box Pleated Ribbon.  It was very easy and I stole the idea from a YouTube video.  Adding three pink pearls from Queen and Co finished it off.

I hope you like this little card.  I appreciate y'all stoppin' in.  God bless y'all.

Challenges:
Word Art Wednesday--#78
ABC Challenge--#26 Mother's Day
Simply Create Too--#36  All About Babies
Fab N Funky--#169  Lots of Pink
Perfect Sentiments Challenge--#77 Make it Feminine

Turtle in the Rain

Welcome back friends.  I have another card for y'all this afternoon.  This one  uses an image and sentiment from QKR Stampede.


I love turtles and this one has the cutest expression. I used Spectrum Noir pens to add color to this little guy.  I matted the image and sentiment on a panel of green DP from DCWV.  The card base is A2 size and made from SU Old Olive.  The background DP is also DCWV.  After I had the card together, I added some Glossy Accents to the rain drops.  This was a very easy card to make.

I hope y'all are enjoying your Wednesday evening.  Have a great night.  God bless.

Challenges:
Seems a Little Sketchy--#38
Creative Craft Challenges 2--#9  All About Animals
Penny's Challenges--#125 Animals

Meljen's Challenge Card

Good afternoon crafty friends.  So glad you took a moment of your time to stop in.  I have been a busy little beaver today.  Even though I don't feel well, my mojo is still on full.

The card I have for y'all today is for Meljen's Designs challenge for this week..a sketch.


I used Meljen's cute little goose to make this card.  I used colored pencils and OMS on the image.  I then added some glitter gel pens to highlight the flowers and swirls.  I made the card base from green Recollections card stock using my Fiskar's Shape Maker.  It's a 4" card.  The DP is from American Crafts and I die cut it with the same Shape Maker.  I matted the image, after die cutting and embossing with a Nestabilities Classic Circle Large die, onto a circle of Recollections pink card stock.  Adding two buttons from my stash finished up this cute card.

Thanks again for stopping by.  God bless y'all.

Challenges:
Meljen's Designs--#157 Sketch Challenge
One Stop Craft Challenge--#226 Buttons and Bows (the bow is on the image)

Love Card

Welcome friends.  I have one more card for y'all before I call it quits for the night/morning.  I hope y'all like it.


I used a digi stamp that had four different images on one sheet.  I'm not sure who the artist is, but I love the images.   I colored them with BIC markers and trimmed them down to 2" squares and matted them on Red card stock from Recollections.  There are lots of layers on this card.  The DP is DCWV and the Black card stock is Recollections.  I got the sentiment from A Piece of Heart.  I pop dotted the sentiment in the middle of card to give it some separation between the images.  Adding four gems from Queen and Co finished it off.

I thank you so much for stopping by to see what I have created.  It means so much that you take the time out of your schedule to check out my crafting.  God bless y'all.

Challenges:
The Cutie Pie Challenge--#43  Lots of Layers

Word Art Wednesday; IDIC; and Created with Love

Happy Wednesday.  If you are like me, you are awaiting the weekend.  I have been sick all week and am so ready to be feeling better.  I did feel well enough today to craft a little, so here ya go...


This little lady was designed by Just Some Lines and is called Gabby's Bike.  I colored her with colored pencils and OMS and then chalked the background.  The sentiment is from Word Art Wednesday.  After coloring the image, I trimmed it down and rounded the corners.  I inked the edges of the image and sentiment with DI Vintage Photo.  Each has a Crumb Cake mat.  The DP is from DCWV and the card base is Old Olive from SU.  I added a bit of Sakura Glitter Gel pen to the butterflies and flower centers.

Thank you for stopping in today.  I pray y'all have a great day.  God bless.

Challenges:
Word Art Wednesday--Psalm103:2
Robyn's Fetish Challenge--#157 Stripes or Dots
Created with Love--Spring Themed Blog Hop